The steps to write a blog are listed here. Images have Instructions for a quick tutorial and we have written a description above each image. Two videos that cover these instructions can also be viewed if you rather use that format.
Quick Start Video Add more content Video
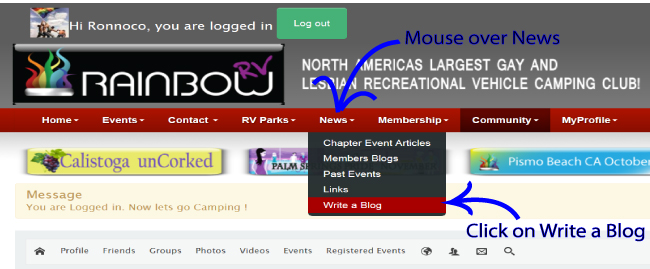
Open the Blog editor tool
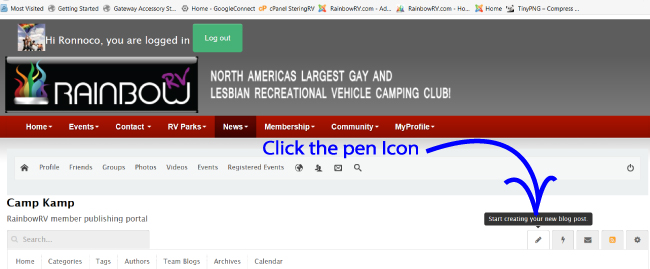
Now that you are in your Personal RainbowRV Blog editor simply click on the Pen Icon
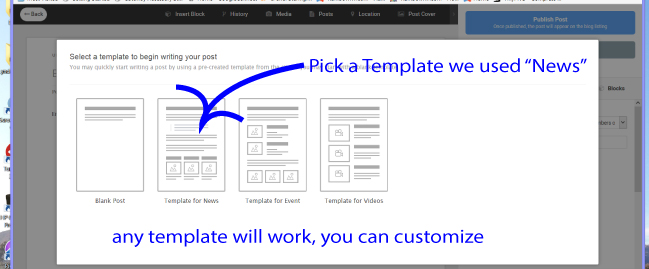
Going great so far. OK, it is time to chose a template.
Lets talk about Blocks. In the template News, we set up several rectangular areas to hold content. The rectangles are only the grid to hold a Block of Content. Each rectangle can take one unique type of content. All words-content (Titles and stories) or all media content (images and video) will be placed in unique blocks. There are many types of blocks. Title Blocks, Text Blocks, Image Blocks, Quote Blocks and Gallery blocks just to name a few. For now lets stick to the choices that are used in the News template. Open the Template for news. Click on the mocked up icon see it in the image below.
Time to replace the text to real words and sentences
When the News Template opens you will find a bunch of text placed in the Blocks we wrote about in the text block of this article above. This template text is woo-puckey, jibberish, or what us computer geeks call "Lorem Ipsum" and simply placed there to hold the block open. Lorem Ipsum text helps us see the structure and gives a visual of what the Blog will look like when it is complete.
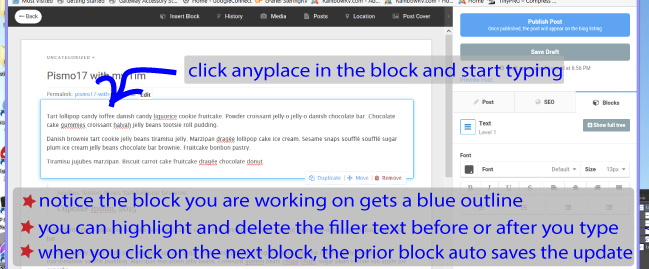
Click on the title where it says Enter A Blog Title and start typing. we set this title block to auto erase the Lorem Ipsum to keep from saving countless blogs named Enter a Blog title. A good name might include the event or product you are blogging about and a unique touch. Like : Pismo with the Girls or Pismo17 in my Bambi . You get the idea about unique names and our file structure. we set the permalink to auto populate the first title you save so dont worry about it. Next, Find the first block of Lorem Ipsum content and click-left-mouse anyplace in that block.
Wow, so far so good. In the video I talk about pre writing the text in a program like Microsoft Word or Apple Pages then doing a copy paste. Please keep in mind that some copy and paste elements like fonts and text colors will not paste because we need to use fonts and colors that are found across all viewer browsers. Not to worry, I placed a whole bunch of text editor options here to make those changes. One other word of caution is with changing text size. If the text size is changed from the browser default, the resizing of blocks may have a problem with mobile browsers. call Greg at 951-830-5997 if you need changes in your blog, have suggestions or questions.
Now for Blocks of Images. The fun part about Blog writing is keeping the reader interested with images. there are several image blocks available. A simple image block, Video block, Multi image gallery block and a post cover image block. We will address the Post cover Image block and Simple image block . Post Cover Image shows up in the blog main page and is used to promote the entire blog throughout the website. Best method to add images is to have them ready in a open folder then drag them to th block. The Post Cover image is not in the post body so look for the link at the top of the editor screen. 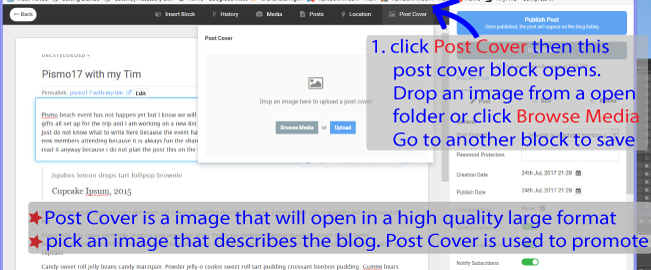
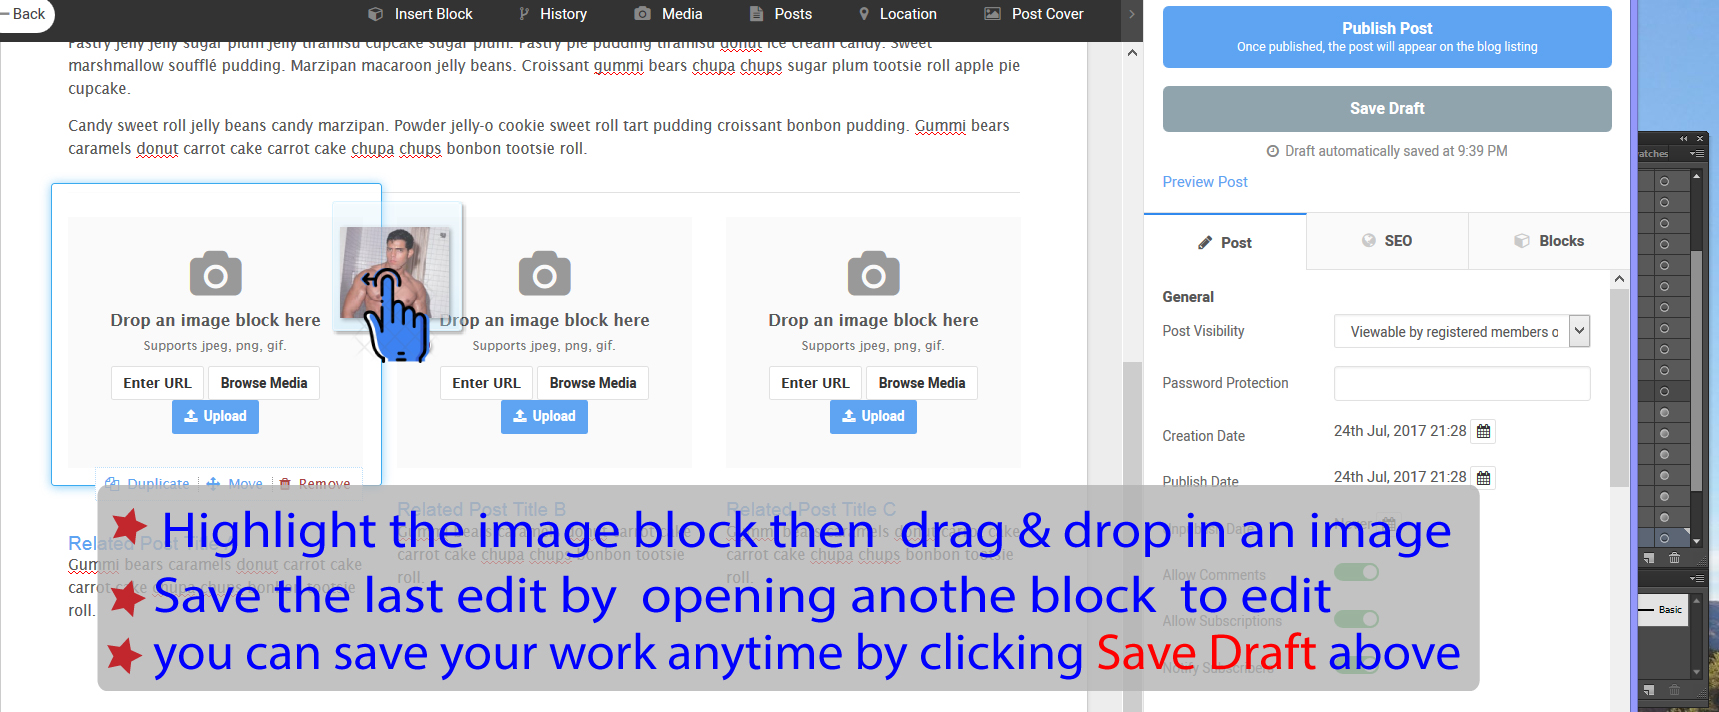
Now for the other three images in the template. Simple Image Block. Highlight the image block then drag an image from a open folder or click Browse Media and search your computer files for the image to upload. Under these images are two mini Text Blocks. One is the Image Title and the other is the image description. The two different blocks have some formatting that will help make the image title look different than the image story. Cool Ha. Three image blocks and 6 text blocks later you have a wonderful looking and interesting story coming together.
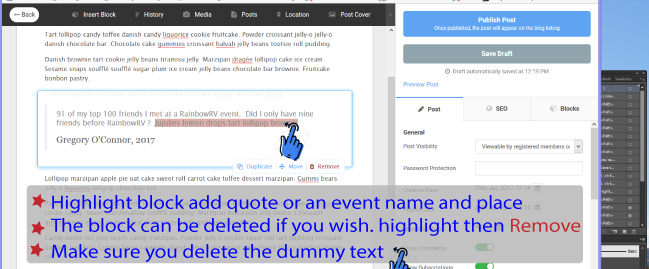
Quote Block. We set a text block up with some formatting to make a quote look good. Dear Cupcake, Quotes are fun and often say a bunch about your experience. Click in the quote block and replace "Jujubes lemon drops tart lollipop brownie" with your quote and replace "Cupcake Ipsum" with your name. You can add the date or delete if you wish
Lifesavers are sweet but not just a candy. We set up a command to save your work from time to time. Look on top of the screen and click on . History . to see a list of the saves. A good idea is to also save a Draft when you get half way done. Backup the work by clicking on . Save Draft . in the grey block top right area of the screen. This action will not move you out of the component but it will save a hard copy of the work. Saved Drafts are hidden in your drafts folder and can be retrieved in a new session by. Writeblog link/ Gear-Icon "more settings"/ Select Filter/ Drafts/ pick from the list.
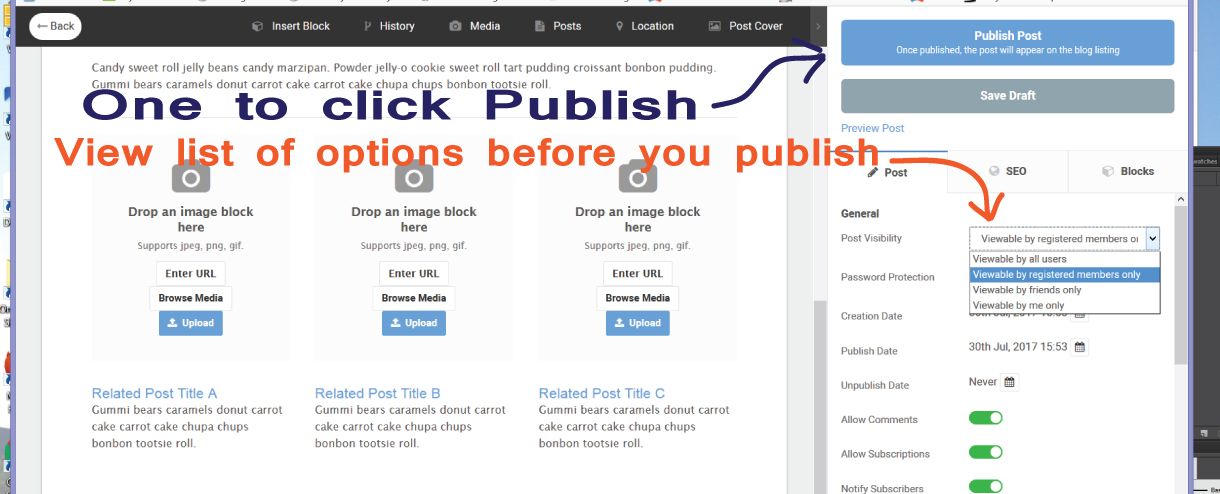
Take it to Print. When you think you are ready to make your post avaliable to the members, click Publish Post. Do not stress over anything because we made it easy to edit your blog masterpiece anytime you are logged in. Just under the grey save draft button is a Preview Post button that mocks up a post for your review in another window. Preview Post is a useful tool but,,, pull the trigger,,,pop the clutch Click Publish Post and see what it looks like real time. Options in the Post/General/Post Visability window make it possible to publish and only show the post to your username- view which is a good way to preview but please remember to edit the post and change Post Visability back to the default.